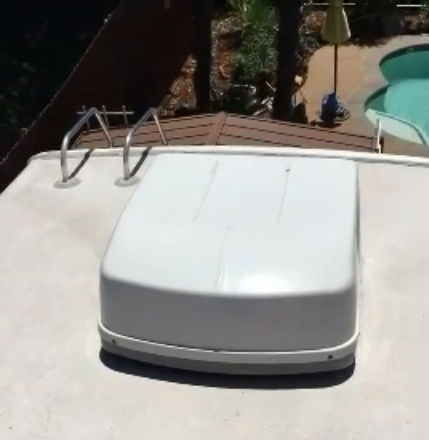
One of the biggest burdens of any RVer is often maintenance and repair. Whether it’s a breakdown in the middle of nowhere or a pesky roof leak, these things need fixing to maintain the value of the RV.
In fact, and you may not expect it, but RV roof leaks are actually one of the quickest ways to damage and decrease the value of your RV. This is due to the fact that water seeps in through the roof leaks and damages the interior furnishings and appliances in your RV.
Water damage can lead to electrical problems and much more. So, fixing any roof leak on your RV is a top priority.
Inspecting Your RV’s Roof
Before you can fix a roof leak, you need to be able to successfully identify roof damage and leaks when you inspect your RV.
Consistently inspecting your RV will make your life so much easier and relieve you from so much stress. Taking just a few minutes to look over the interior of your RV or taking a half-hour or so to inspect your RV’s roof will help you catch any issues early on and avoid any big maintenance costs.
To safely inspect your roof, check your RV’s owner’s manual for information about how safe the roof is for supporting weight.
If you’re unable to find information in the owner’s manual, a quick way of knowing your roof is likely able to support your weight relies on whether or not your RV features a ladder for access to the roof. A ladder providing access to the roof typically implies your RV’s roof is safe for walking on and inspecting.
An RV without a roof-access ladder should be inspected in a different manner. To inspect the roof on an RV that doesn’t necessarily support weight as well, use sheets of plywood to walk on certain areas of the roof.
While inspecting, look for areas that are cracked, dried, or punctured. Also, check the seals at the edges of the roof to ensure they are properly sealed.
You can also inspect the interior of your RV to check for roof and water damage. If you see dark spots on the ceiling and upper wall panels, that’s a telltale sign of water seeping through a damaged roof and into the interior of the recreational vehicle. Also, if sunlight is shining through small areas in the ceiling of the vehicle, that means that water is able to seep through as well.
When you see the signs of roof damage and leaks in your RV, you need to act before it becomes too bad and requires a completely new roof for installation. Installing a new roof is costly and time-consuming, so of course, you’re going to act quickly.
Fixing Your RV’s Roof Leak
The easiest and most convenient way to fix your RV’s roof leak is to use a quality coating and sealant for the roof. A new coating will provide your roof with protection from the elements like sun, snow, and rain and will also seal any leaks and damages to the roof.
If you own a rubber roof and the damages are sparse, simply use a small tube of quality rubber sealant or specially designed repair tape that is made just for rubber roofs. Also, you might find the caulking on your roof is not up to par. Caulking usually surrounds joints, AC’s, and vents. If you’re not satisfied with the amount of caulking, use a quality caulk to ensure your roof’s durability is up to scratch.


